How to Build a Sportswear Tech Pack: Your Manufacturing Blueprint
Turn a design into instructions a factory can follow: technical flats, controlled materials, fit measurements, artwork and production approvals.
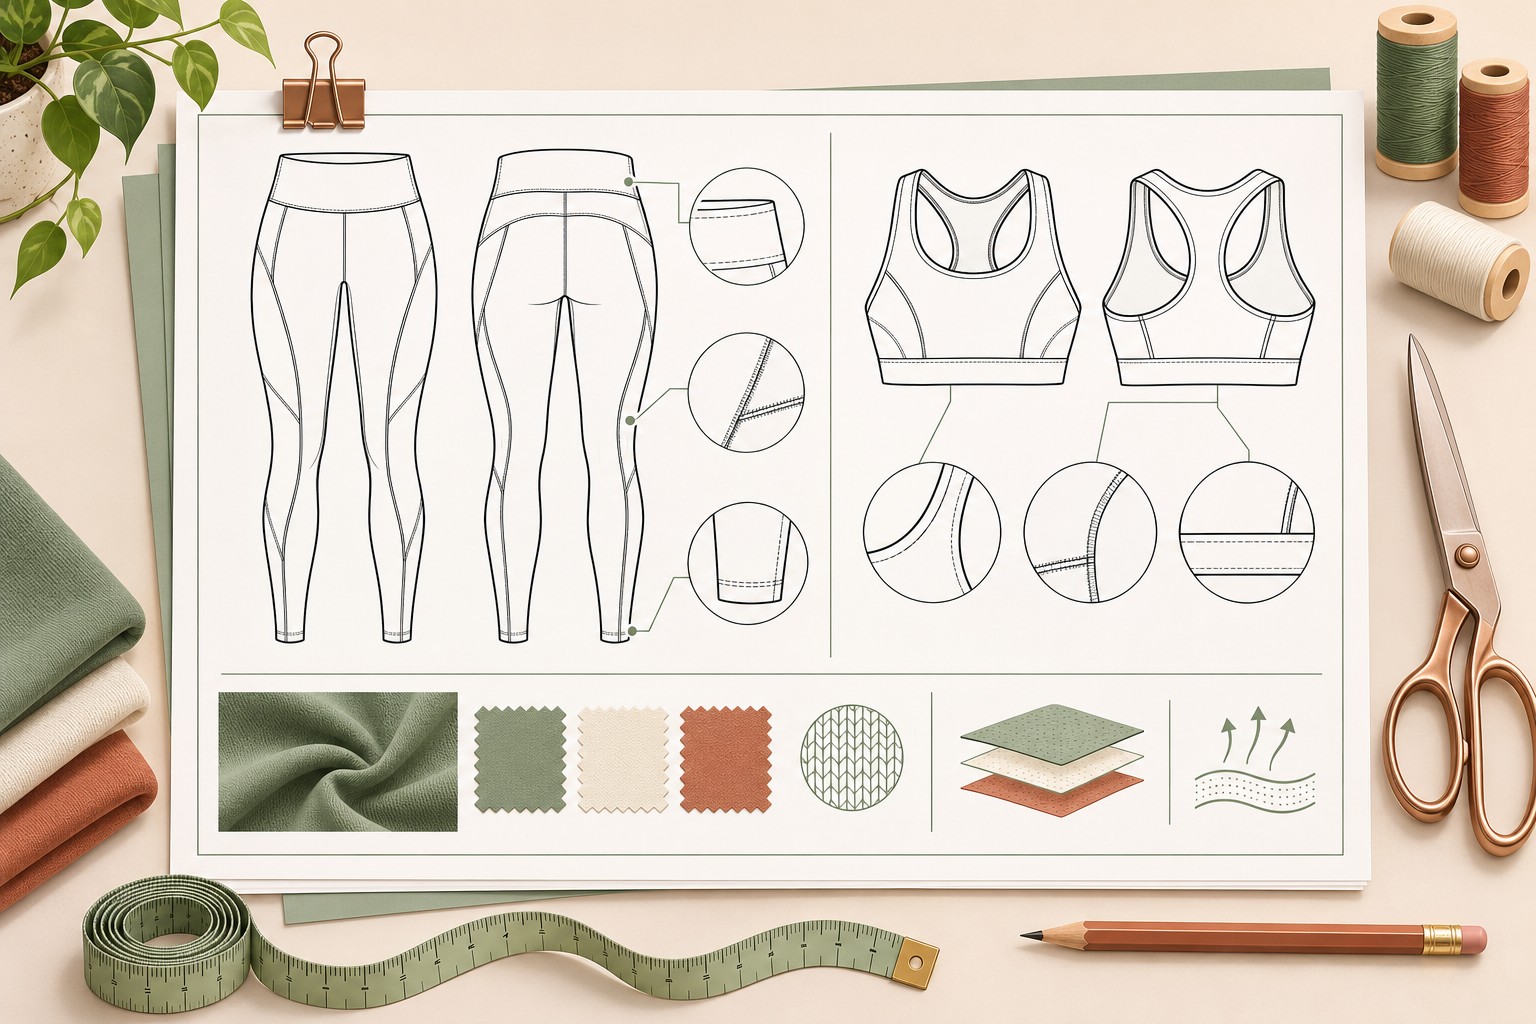
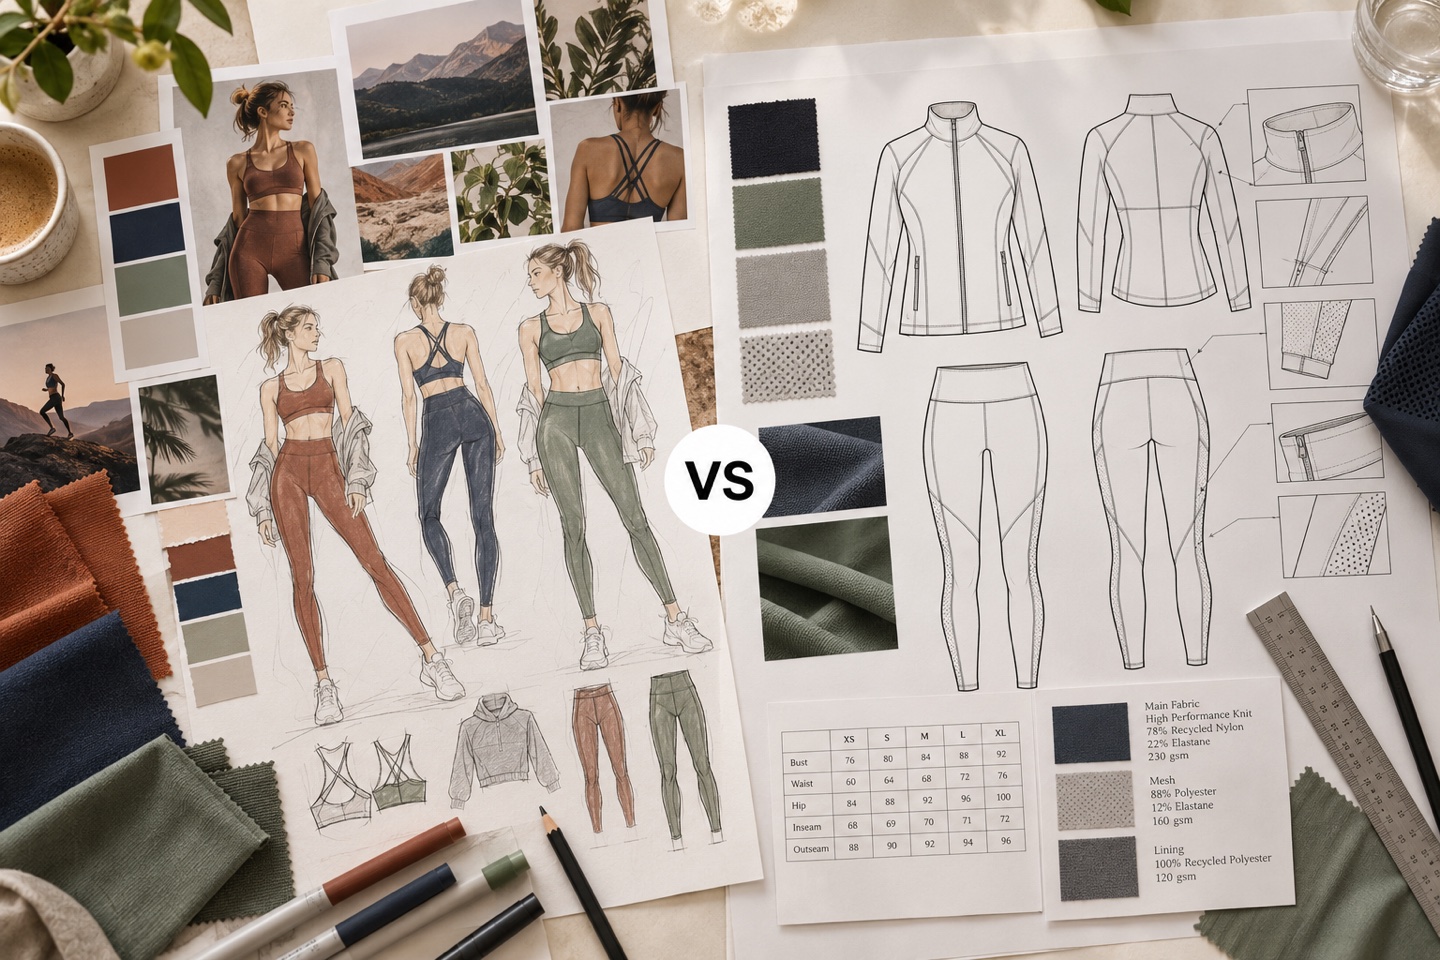
A sketch communicates the look of a garment. A sportswear tech pack connects that look to repeatable manufacturing instructions: what to cut, which components to use, how to join them and what the finished garment must pass. It gives the sample room and production line the same reference.
In Sportxia’s custom sportswear development, stretch behaviour, seam comfort and measurement methods need to be agreed together. Two leggings can share a silhouette yet feel completely different when fabric recovery, waistband tension or gusset construction changes. The technical package records the approved combination.
Allow roughly 3–5 hours per style to assemble a first complete version once its design inputs are ready. More complex patterns and missing material data require additional development. Keep pages visual, sentences direct and instructions usable on a black-and-white factory printout.
This guide follows eight practical steps. Use it alongside the full apparel product development workflow when planning sourcing, sampling and production release.
What You Need Before You Start
External tutorial: Dovy Kairys’s tech pack walkthrough. Use the article’s sportswear-specific requirements when building your own production file.
Input collection allowance: 2–4 hours. This is separate from the 3–5-hour document-building allowance. Obtain the physical, visual and commercial inputs before asking a factory to quote a finished specification.
Essential Assets
- A physical reference garment: use it to discuss hand feel, construction and stretch. A photograph cannot communicate surface texture or recovery. Identify which features are references and which belong to your original design.
- Artwork source files: collect editable .AI or .EPS vectors for logos and diagrams. A JPEG may be useful for a visual reference, but it cannot be enlarged indefinitely without loss of detail.
- A fit-intent statement: distinguish “high compression/sculpt” from a lighter “naked feel.” Describe support, coverage and movement so the developer can evaluate GSM, knit construction and elastane content together.
- Draft label copy: prepare fibre percentages, care instructions, size and country-of-origin information. Mark unknown fields as unresolved internally; final production labels must use verified information.
Software and Workflow
Draw flats in Adobe Illustrator, CorelDRAW or another capable vector editor. Maintain measurements and the BOM in Excel or Google Sheets. A PLM system can centralise the same information when a range grows.
Label callouts with a number or letter: “Detail A” stays meaningful after photocopying, while “the red line” may disappear. Appoint one final PP-sample approver and collect the team’s comments before sending one consolidated revision brief.
Download the Activewear Tech Pack Checklist
Check the BOM, specification sheets and packaging instructions before sending the file. The printable checklist includes space for the revision, open items and release decision.
Ask Sportxia to review your material and sample brief if an input still needs development.
Step 1. Build the Control Panel and Title Page

The opening page identifies the instruction set. Give the production manager enough information to distinguish this style, market and revision from every other file in the sample room.
- Style name and SKU: for example, Apex Runner V2, W-LEG-002. Use the same identifier in the quotation, sample tag and purchase order.
- Season and market: a reference such as SS25 / Women’s High-Impact shows the type of context to record; replace it with your actual programme.
- Size range and base: list XS–XXL where appropriate, explicitly identifying Medium as the fit base when that is your chosen size.
- Document ownership: name the technical lead, factory contact and approval authority. Add the agreed confidentiality and design-ownership notice.
Place a revision log beneath the style header. Its fields should include version, date, change and author. A useful entry says “V2: change approved flatseam density from 10 to 12 SPI”, then names the affected page. “Updated design” does not identify the operation to change.
Export a PDF and reopen it on a second device. At 200% zoom, inspect line sharpness, selectable text, missing fonts and clipped dimensions. In PLM, connect these fields to the global style header so updates remain consistent.
Step 2. Draw the Technical Flats

Provide front and back flats without a fashion pose. Include a side view when lateral panels, pockets or other features need it. Keep the silhouette, panel boundaries and stitch paths visually distinct.
As a starting drawing convention, use approximately 2 pt for the outer silhouette and 0.5 pt for internal seams and stitch lines. Adjust for page scale so the printed drawing remains readable. Early hand sketches can start a discussion, but the release file needs clear, reproducible geometry.
Enlarge features that are difficult to read
- Waistband: show elastic width, internal assembly and drawcord exits.
- Gusset: distinguish diamond and triangular shapes, their orientation and panel joins.
- Trims: detail zipper garages, bonded tape paths and strap attachments.
Connect numbered arrows to the construction sheet and BOM. Space arrows so they do not obscure each other. Define abbreviations such as FL for the agreed flatseam, CS for coverstitch and DN for a specified double-needle operation; a legend supports the drawing but does not replace a stitch specification.
When ownership of technical drawings is unclear, use our guide to technical designers and fashion designers to decide who should prepare and review the file.
Step 3. Create the Garment Construction Sheet

A construction sheet explains how adjoining panels form a wearable garment. Record the zone, seam formation, stitch type, seam allowance, density, thread and reinforcement. ISO 4915 classifies stitch types; the stitch number alone does not define the entire seam assembly.
| Garment zone | Candidate stitch / process | Seam requirement | Additional specification | Physical approval |
|---|---|---|---|---|
| Skin-contact joins | 607 flatseam where suitable | Low-profile agreed assembly; stitch type is not the seam class | Allowance, thread, needle and approved density | Extension and contact comfort |
| Internal structural joins | 514 four-thread overedge where suitable | Select for the actual knit and expected load | Allowance, tension and seam opening limit | Strength, grinning and recovery |
| Hems and waistbands | Appropriate coverstitch or validated bonding | Define edge finish and reinforcement | Bonding process/adhesive where used | Wash, extension and edge adhesion |
The reference starting range of 12–14 SPI for compression garments is a sampling input. Confirm it on the actual fabric with the chosen thread, needle, tension and extension requirement. More stitches do not automatically produce better elasticity or strength.
Show bar-tacks at pocket corners, strap anchors and drawstring exits where the construction calls for them. Include a construction key and connect each operation to its drawing detail. Sportxia’s cut-and-sew service can help review the proposed assembly against available equipment.
Verify comfort and extension on a physical sample
Run a finger across the skin-contact side. Look for raised edges or hard thread ends, then extend the seam through the agreed use range. Popping threads, unacceptable seam opening or painful friction need investigation. Compare the sample with the agreed construction instead of stretching it without a defined limit.
Step 4. Construct the Bill of Materials
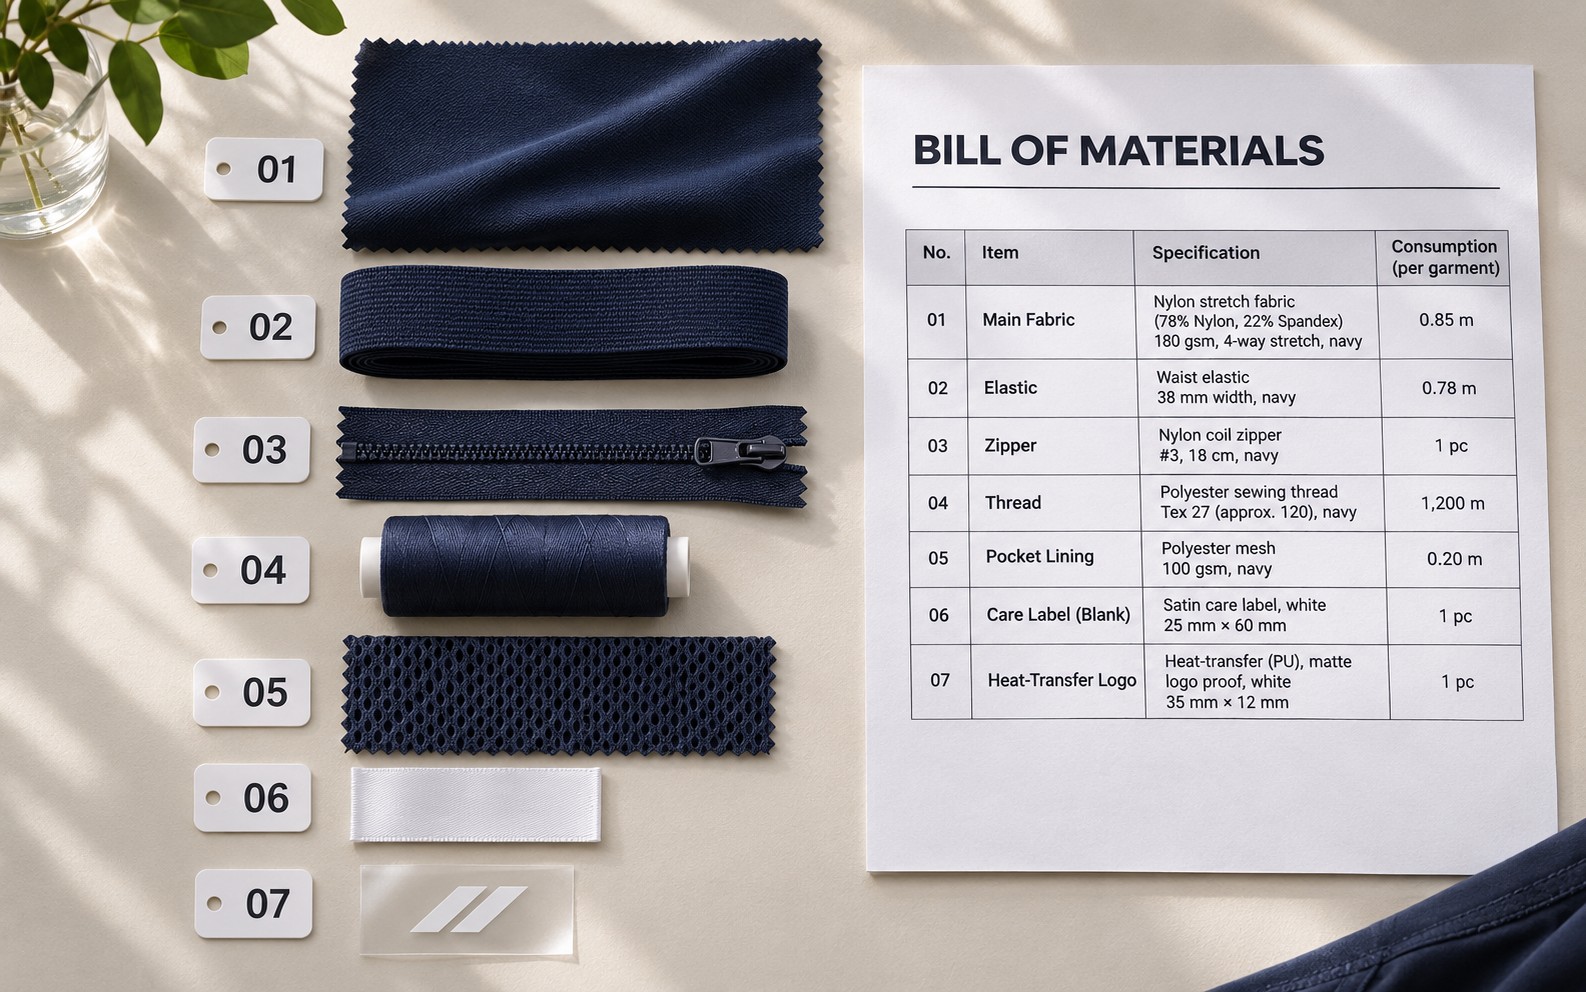
The BOM links the design to the exact components being purchased. Assign a unique line and code to every fabric, trim and label, including components hidden inside the garment. Use the approved BOM as part of the quotation and order specification.
- Main fabric: record composition, knit structure, GSM and finish. One illustrative specification is 80% nylon 6.6 / 20% spandex, 220 GSM interlock with a wicking finish; it is an example to develop and test, not a universal recipe.
- Hand feel: describe “buttery/brushed” or “slick/cool” alongside a retained swatch. Surface treatment and construction affect feel as well as fibre content.
- Hardware: identify the approved source and article, such as a specified YKK #3 invisible zipper, plus colour, length and relevant performance requirements.
- Hidden items: include stabilisers, interfacing, pocket lining, elastic, thread and internal tapes. Cross-check every drawing callout against a BOM line.
| ID / Component | Controlled specification | Source / Colour | Approval record | Change control |
|---|---|---|---|---|
| FAB-01 / Main knit | 80% nylon 6.6 / 20% spandex; 220 GSM interlock; agreed finish | Mill and article code; physical colour standard | Swatch ID / Lab dip / Test report | Written approval before substitution |
| EL-01 / Waist elastic | Width, composition, extension and recovery | Supplier/article; colour | Elastic sample / Garment trial | Check tension with actual knit |
| ZIP-01 / Selected zipper | Example: specified YKK #3 invisible zipper; length and function | Approved source/article | Physical trim / Function test | No unapproved alternate |
| LIN-01 / Pocket lining | Composition, mass and construction | Supplier/article; shade | Retained lining swatch | Record any revised source |
| LAB-01 / Label package | Verified care, fibre, origin, size and placement | Artwork revision / Process | Label or transfer proof | Sign off copy before release |
State clearly: Material substitutions require written approval before sampling or bulk production. Record a proposed alternative as a new submission with its own swatch and test evidence. A matching colour does not establish equivalent recovery or hand feel.
Where the factory nominates a material, define the outcome: for example, a Grade 4 pilling target under the agreed method and exposure, together with required OEKO-TEX STANDARD 100 coverage. Verify certificate scope and traceability; certification alone does not establish every performance claim.
Step 5. Define Fabric Performance and Sourcing

A fibre ratio cannot predict how a garment performs during a squat or after washing. Add a performance block with a test method, preparation, target, tolerance and evidence reference. Separate measurable acceptance criteria from a descriptive marketing phrase.
| Property | Example target | Method / Conditions to record | Tolerance / Decision | Evidence |
|---|---|---|---|---|
| Recovery | More than 90% within 1 minute | Extension, load, hold time, direction and calculation | Use an agreed recovery definition | Test report and material ID |
| Opacity / Coverage | No unacceptable show-through at 40% extension | Light level, colour, background, sample conditioning and fit | Approved physical coverage standard | Stretch/fit review record |
| Pilling | Minimum grade 3.5; selected BOM example grade 4 | Agreed test method, cycles and rating procedure | State which threshold governs the style | Laboratory report |
| Wash dimensional change | Maximum 5% shrinkage in stated directions | Wash/dry programme, cycles and measurement procedure | Also set any growth limit where needed | Before/after measurement report |
| Vertical wicking | Buyer-defined result; no universal pass value | AATCC TM197; conditions and reporting direction | Write the required distance/time basis | Method-specific laboratory report |
The table preserves the guide’s example targets, including more than 90% recovery within 1 minute, coverage at 40% extension, a minimum pilling grade of 3.5 and maximum 5% shrinkage. These require agreed test conditions. Grade 4 in the BOM example is a stricter selected target; choose the applicable requirement explicitly.
Control the material source and approvals
With a nominated mill, record its identity and article code. For factory-sourced fabric, obtain lab dips for colour and quality swatches for structure and feel before release. Connect the approved standard to receiving records and lot numbers. Repeat this check when a material or finishing process changes.
Check recovery by the agreed procedure, then compare the surface with the approved tactile sample. Smooth nylon can feel cool and brushed polyester can feel soft, but fibre labels alone cannot guarantee those sensations. Reject rippling or loss of recovery when it breaches the recorded requirement.
Step 6. Build the Measurement and Grading Sheet

Start with a POM drawing. Assign codes such as POM-01: waist width, then show where the tape begins, where it ends and whether the garment is relaxed or extended. Give extended measurements a defined procedure rather than an instruction to “pull firmly.”
A technical designer should evaluate negative ease against the target body, fabric modulus and intended support. Grade increments can differ between zones and sizes; a single proportional enlargement may distort compression or strap placement. Confirm the size set on the approved material.
Record point-specific tolerances. A critical compression POM might use an agreed ±0.5 cm allowance, while another feature needs a different tolerance. Clearly mark critical points with both text and a symbol. Define whether the number is a flat width or a full circumference.
Use ASTM D5585 only within its stated adult-female body-measurement scope. Body tables support a fit baseline; they are not finished garment measurements. Likewise, a label pairing such as US M / EU 38 is a proposed brand conversion to verify, not a universal equivalence.
Check repeatability and fit
Ask two people to measure the same sample independently using the written guide. If they disagree, resolve the method before judging the factory. Then wear-test waistband rolling, leg-opening pressure and movement. Log each issue against the relevant POM or construction detail.
If a sample rolls, slips or rubs during that wear test, use our activewear fit diagnosis guide to separate material, rise, elastic and seam causes before revising the measurement or construction sheet.
Step 7. Create the Colorways and Artwork Page

Give every colourway its own drawing and zone schedule. A colour name such as navy is insufficient: specify a physical reference such as Pantone 19-4029 TCX, confirm it against the current Pantone reference system and approve a lab dip on the selected fabric.
Keep master artwork available through a controlled source-file link as well as the visual PDF. Use editable .AI/.EPS vectors for suitable logos; embroidery also requires appropriate digitising and a physical sew-out. For a raster sublimation image, agree approximately 300 DPI at the actual print size with the printer. A low-resolution source does not gain detail simply by changing its DPI setting.
- Size: specify dimensions, for example 55 mm × 20 mm, instead of “scale to fit.”
- Seam-relative location: state the point and direction, such as 15 cm below high point shoulder (HPS).
- Edge-relative location: an example is 5 cm above the cuff edge.
- Cross-size rule: identify which distances remain fixed and which change with the grade. Do not move a logo by eye.
The artwork sheet should show at least the front/back placement and a close detail with two reference dimensions. The template below the article’s download links includes space for those coordinates.
Step 8. Define Operations, QC and Revisions

1. Finalise Operations and Packaging
Show the folding method, such as a quarter fold, and the selected bag material, thickness and required warnings. Identify care-label placement, fibre content, country of origin and heat-transfer size marks. Specify the destination’s requirements before artwork approval.
For warehouse delivery, agree carton dimensions, weight limits and label positions with the receiving 3PL. Use the barcode identifier that the destination requires: a UPC/GTIN may suit retail stock, while a fulfilment programme may require its own label. A DDP delivery arrangement does not itself impose a universal UPC requirement. Include the approved scan test and artwork in the packing page.
2. Set the Inspection Standard
Where AQL 2.5 is selected for major defects, record the full plan under the agreed edition of ISO 2859-1: lot size, inspection level, sample size, normal/tightened status, defect definitions and acceptance/rejection numbers. The current ISO listing is the 2026 edition. AQL 2.5 is not a promise that every delivered lot contains at most 2.5% defective garments.
- Critical: define safety hazards such as needle fragments and unacceptable contamination; require no acceptance of identified critical hazards and a separate prevention/control process.
- Major: define functional failures, broken zippers or critical measurements outside tolerance.
- Minor: define cosmetic departures such as untrimmed thread. Colour shading may be major where it breaches the agreed standard.
3. Execute Tests and Manage Revisions
Arrange the required rubbing-colourfastness and wash-dimensional-change checks before committing the relevant bulk fabric. Confirm the selected method, cycles, care programme and threshold. Sample inspection and fabric performance testing are different parts of the approval record.
Use one revision matrix: attach a marked photo, identify the defect, state the instruction and name the owner. A precise instruction might read “reduce relaxed waistband flat width by 1.5 cm”, with a revised POM and fit review. Link the correction to the new file version and sample tag.
Retain a signed and dated pre-production sample representative of approved materials, colour, construction, artwork and packing. Complete the agreed stretch and tactile checks: no unacceptable popping, bubbling, adhesive edges or scratching. Resolve open differences before the affected production operation begins.
Troubleshooting Common Tech Pack Failures
In Sportxia’s experience, about 90% of the production problems covered by this troubleshooting approach trace back to ambiguous technical instructions. This is a company-reported observation, not an independently measured industry rate. Diagnose the missing instruction and verify the correction before increasing quantity.
1. The Factory Changes a Fabric or Trim
Likely gap: the BOM lacks an article code or an approval rule. Correction: hold the affected sample, identify the proposed material and obtain a swatch and lab dip. Use an agreed procedure such as ASTM D3776/D3776M for fabric mass per unit area. Prevention: link the approved source, physical standard and written substitution control to the PP release.
2. The Label Says M but the Garment Fits Like S
Likely gap: the parties use different relaxed/extended conditions or tape positions. Correction: add a POM diagram and a method such as “laid flat, chest width 1 inch below the armhole.” Prevention: identify critical points in words and with a symbol, then repeat the two-person measurement check.
3. Seams Pop or Rub Against the Skin
Likely gap: the stitch, thread, seam assembly or tension is unsuitable for the required extension. Correction: review a specified 607 flatseam or another suitable construction with the technician. A stitch code does not guarantee comfort or strength. Prevention: include a defined seam-extension and wear check in the sampling plan.
4. Artwork Drifts Between Sizes
Likely gap: placement was judged visually. Correction: state measurable coordinates, such as a centre logo 15 cm below the neckline reference, and distinguish that reference from HPS. Prevention: document placement grading and approve the relevant size-set positions.
5. The Warehouse Rejects the Packaging
Likely gap: the barcode, warning, carton size or receiving label is wrong. Correction: reconcile the current 3PL instructions with a dedicated packaging page. Prevention: approve a packed unit and carton-label proof, including the scan and weight checks, before shipment.
When to Escalate
If the same deviation occurs twice, pause the affected development or production step. Confirm the current file version, review the page together by video and require the cause and corrective action in writing. Resume when the agreed evidence shows that the correction worked.
Trace the physical seam against its drawing and inspect the intended skin-contact side. A mismatch, painful ridge or failed extension check needs a recorded disposition. Use our manufacturer selection and first-PO guide if the problem also exposes a capability or communication gap.
Questions About Building a Sportswear Tech Pack
How does a spec sheet differ from a full tech pack?
A measurement spec sheet captures POM values, methods, tolerances and grading. The full technical package adds the style header, drawings, construction, BOM, performance criteria, artwork, labels, packing and approval history. Measurements alone leave material and construction choices unresolved.
How long does a professional tech pack take?
Allow about 3–5 hours per style after the necessary assets are available, plus the guide’s 2–4-hour input-gathering allowance where needed. In Sportxia’s experience, clearer files have helped reduce an average 4 sample rounds to 1–2 on suitable projects. This company-reported result can save weeks and hundreds of dollars in courier costs; it is not a guaranteed result or a fixed development quotation.
Do I have to use Adobe Illustrator?
No single brand of software is mandatory. Illustrator and CorelDRAW are useful options for editable vector flats. Compile the data in Sheets, Excel or PLM and issue a readable PDF. Use appropriate resolution at output size for raster artwork; vectors remain easier to scale for line drawings.
Does a tech pack protect my design from copying?
It records manufacturing instructions and can support an agreed specification, but it does not itself confer exclusive design rights. Define confidentiality, permitted use, ownership and access before sharing sensitive files. Review suitable NDA or NNN terms for the transaction and jurisdiction. For branding, consult the relevant IP office, such as the USPTO; consider specialist advice for potentially patentable innovations.
Release a Complete Manufacturing Blueprint
Your release should now contain eight connected parts: the title/control page, technical flats, construction sheet, BOM, fabric-performance block, measurement/grade sheet, colour/artwork page and operations/QC instructions. The version and physical approvals should identify the same intended garment.
- Export and attach: issue one clear PDF, with editable drawings and master artwork supplied separately through controlled links.
- Request comparable quotes: send the same revision to 2–3 manufacturers and compare materials, unit price, sample scope and lead time.
- Run the approval loop: sample 1 → one revision brief → sample 2 where needed → PP approval. Add rounds when evidence requires them rather than approving an unresolved issue to meet a target.
When the file is ready, use ten factory questions covering samples, MOQ, QC and terms to compare responses to the same revision. Before committing the order, verify the selected manufacturer and its production evidence against your product requirements.
Use the checklist before sending. Sportxia’s standard planning ranges are 7–15 days for sampling and 15–30 days for bulk production, subject to material availability, approvals and the agreed programme. Discuss your actual file and schedule with the team.
For the final handover, ask a colleague to follow the document without a verbal explanation. Any question that changes material, fit, assembly or approval belongs in the controlled file.
Related reading: a custom design needs a different development scope from a pre-existing style with new branding. Review custom cut-and-sew development and private-label options to agree which technical records you supply and which the factory develops.
Reviewed November 3, 2026. The 90% observation and sample-round results are company-reported. Measurement, test and process examples require a style-specific specification. Illustrations explain the workflow; the written approved specification controls production. Send a correction.
Related Posts


READY TO MOVE FROM DRAWING TO SAMPLE?
Let’s Review Your Sportswear Tech Pack
Share your style, intended fit, material references and launch target. Sportxia will help identify the inputs needed for a sample and production plan.
Discuss Your Sportswear Project
Leave a Reply